

Peri: Quick Start Guide
Experience seamless payment processing with PeriPOS, a web portal for managing in-store and online transactions, tracking fees, and effortlessly pairing and activating your card reader terminals.
New Merchants will receive a Welcome email containing a link to activate your PeriPOS account. Your PeriPOS account is set up using the email which you used for onboarding as a Peri merchant. For any questions, please contact peri@solera.com or 1-888-691-8480.

Logging In

Merchant Information

Devices
Transactions
Logging In
Logging In
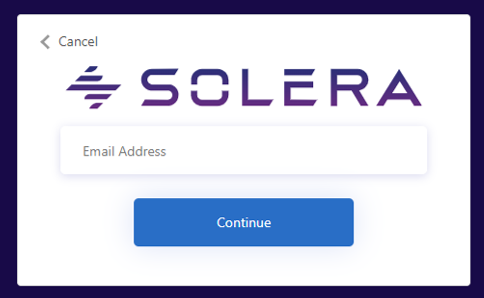
In a browser, navigate to https://pos.peripay.com
The screen below is the first page that you’ll be presented with when you log in. Enter your email address.
If you do not know your password, please click the Forgot Password link and follow the instructions.
Logging In
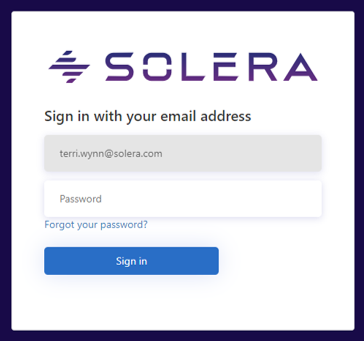
In a browser, navigate to my.solera.com
Enter your password. If you do not know your password, please click the Forgot Password link and follow the instructions.
Note: The portal uses MFA (Multifactor Authentication)
Logging In
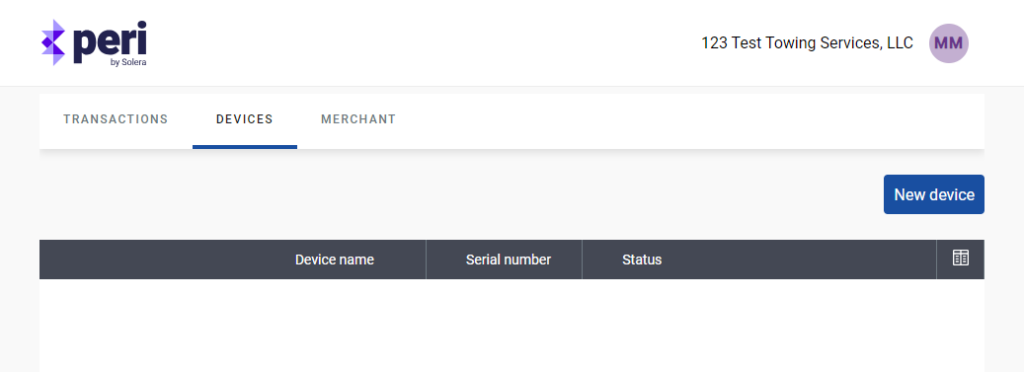
Once logged in, you will see the business name in the upper right-hand corner.
The transactions tab is selected by default. Transactions are viewable here.

Merchant Information
Click on Merchant Tab. The Merchants information to display on receipts is set here. Currently merchants are unable to edit this information.

Devices
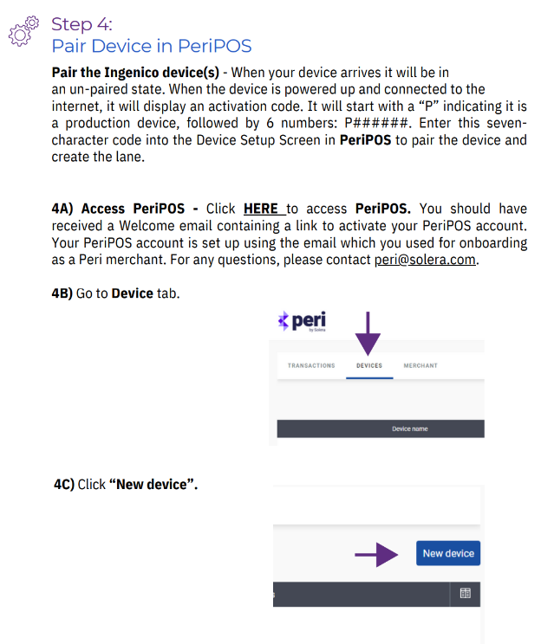
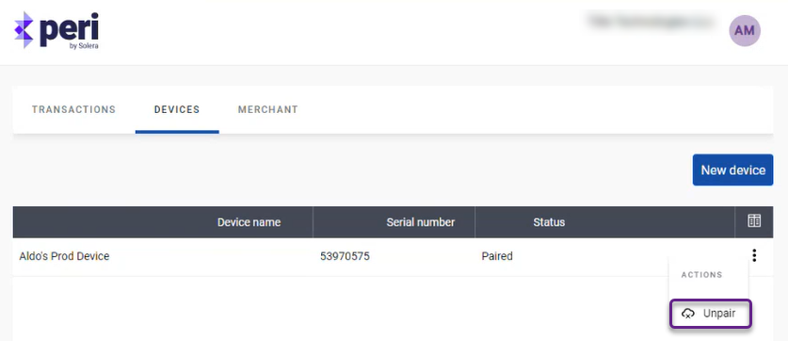
This is where you will see the list of all card reader terminals associated with your merchant account. Click on Devices Tab.
Click on New device to add a new device.
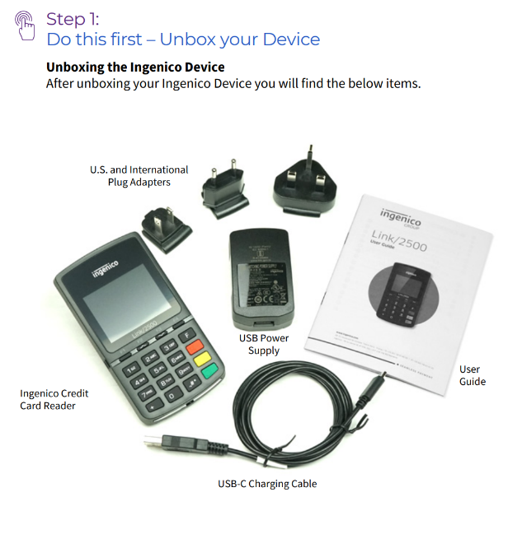
Link 2500


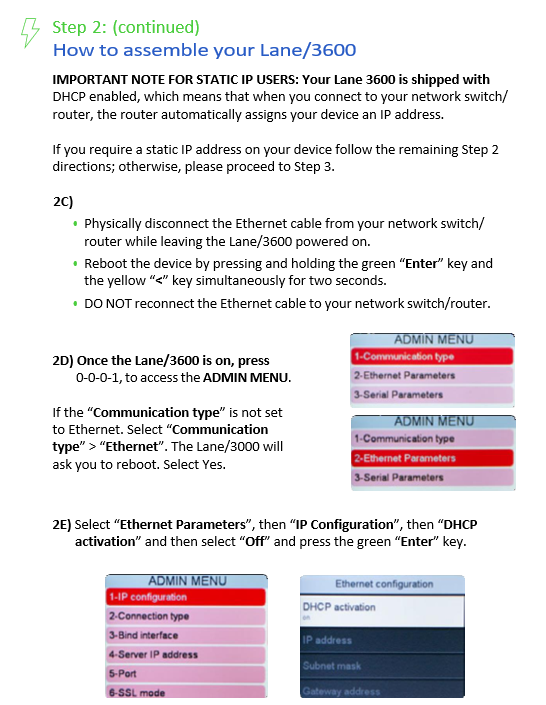
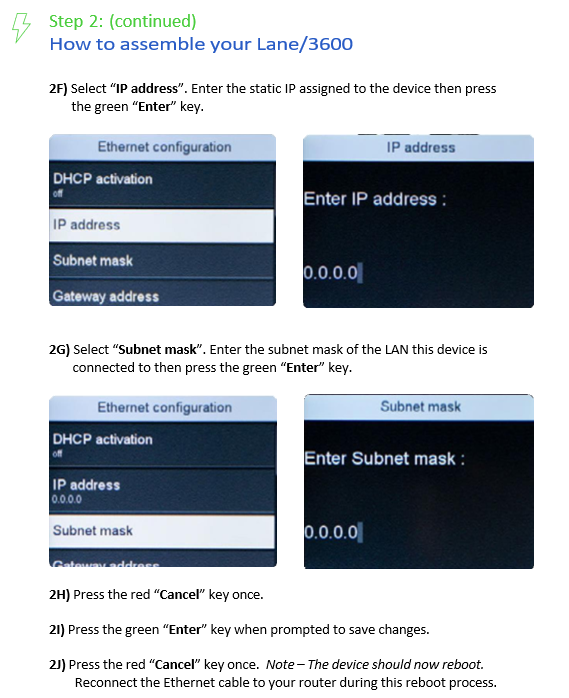
Lane 3600

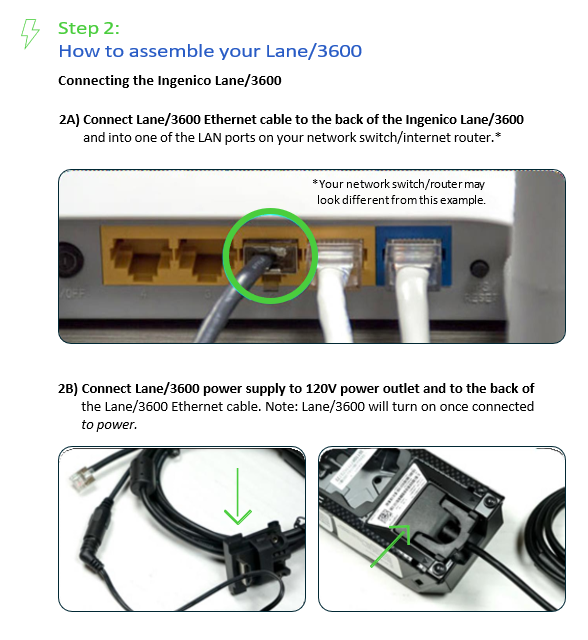
Lane 7000


Unpairing Devices
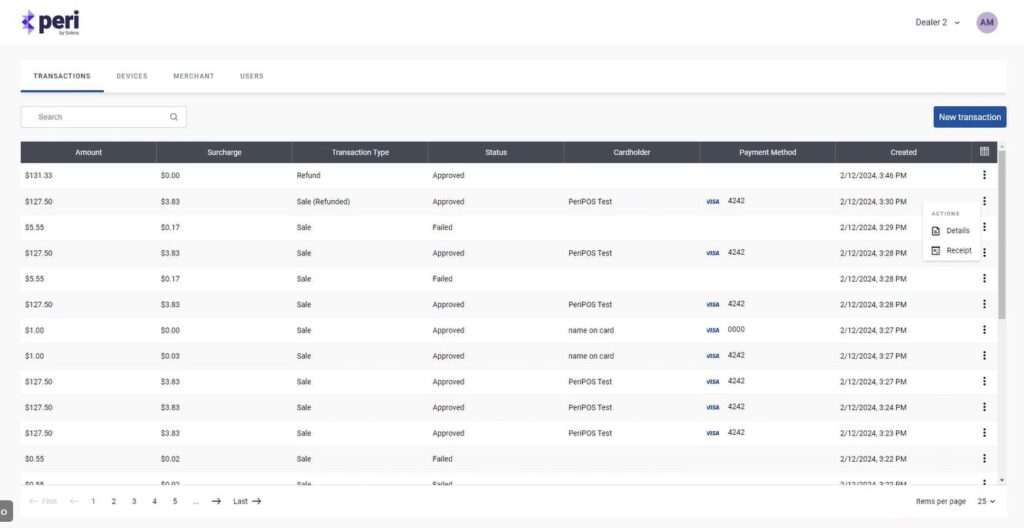
Transactions
✓ Displays a list of all the transactions and statuses.
✓ You can view or reprint receipts.
✓ You can refund transactions.
✓ üYou will create new transactions here (currently this must be completed with each new transaction).

Creating Transactions
1. You will create new transactions using online or terminal payment types..
Currently this must be completed with each new transaction.
a. Click New transaction.
b. Select Payment Type, Terminal.
c. Select the device to be used under Description.
d. Enter the Product Code.
e. Enter the description.
f. Enter the Quantity.
g. Enter the total amount to be processed.h. Click on +Add Product, multiple line items can be added here for an itemized receipt.
h. Click on +Add Product, multiple line items can be added here for an itemized receipt.
i. Line items can also be deleted here.
j. Click Create.
Creating Transactions (continued)
j. Click Create and the Terminal will be ready to process the transaction.
Note: There is no timeout on the spinner.
Creating Transactions (continued)
2.The Transaction will then show on the transactions screen.
Refunding Transactions
1. Card does not need to be present to refund the purchase.
2. The refund must be the complete amount, if there is a partial refund the difference will need to be processed as a new transaction.
3. Click on three dots next to the transaction you want to refund.
4. Select Refund.
Refunding Transactions (continuned)
5. The pop up will ask, “Are you sure you want to refund this transaction?”
6. Select OK
7. The spinner will appear for a few seconds.

Refunding Transactions (continued)
8.You will see the refund appear under the Transactions tab.

Transaction Details
1. To view the details of a transaction, click on the three dots next to the desired transaction, and select Details.
Transaction Details (continued)
2. Merchant will be able to view the transaction details of a transaction.

Transaction Receipts
1. To view the receipt of a transaction, click on the three dots next to the desired transaction, and select Receipt.
Transaction Receipts (continued)
2. Merchant will be able to view the transaction receipt of a transaction.
Have questions or need assistance?
Our dedicated support team is ready to help.
Phone: +1 (888) 691-8480 7AM-7PM, M-F Central Time
Email: peri@solera.com
We look forward to helping your business succeed with fast and reliable solutions.